Proper System Shutdown and Preparation Before Starting
Before you touch a single vent cover, the most critical step involves completely shutting down your HVAC system. This is not merely switching your thermostat to the off position. You must locate your electrical panel and flip the breaker that controls your furnace or air handler to the off position. This precaution prevents the system from cycling on while you are working inside the ductwork, which could create a serious safety hazard and scatter dust throughout your home.
In Alabama’s climate, where systems often run continuously during summer months, residual heat can linger in ductwork for 20 to 30 minutes after shutdown. Wait for this cooling period before beginning work. During this time, gather your supplies: a HEPA-filter vacuum with extension hoses, microfiber cloths, a stiff-bristled brush designed for duct work, a flashlight or headlamp, and protective eyewear and mask rated N95 or higher.
Many homeowners skip the step of sealing off supply registers in rooms you are not actively cleaning. Use painter’s tape and plastic sheeting to cover these openings temporarily. This prevents dislodged debris from being pushed into living spaces when you restart the system. If your home has a return air filter, remove it now and inspect the condition. A clogged filter indicates heavy debris buildup upstream in the return duct, which requires more intensive cleaning attention than supply ducts typically need.
Accessing and Inspecting Hidden Ductwork Sections
Most DIY duct cleaning efforts fail because homeowners only clean the visible register openings and neglect the main trunk lines where the majority of contamination accumulates. After removing register covers, use a bright flashlight to inspect as far into each duct run as possible. Look for visible dust accumulation, but also check for moisture stains, rust spots, or biological growth, all of which indicate problems that simple cleaning cannot resolve.
In older homes throughout the region, flex duct connections often sag or become disconnected in attic spaces and crawlspaces. If you notice weak airflow from certain registers, the issue may not be debris but rather separated ductwork. Accessing these areas requires navigating attic insulation or cramped crawlspaces, which presents its own safety considerations. Always ensure adequate ventilation and lighting in these spaces, and never work alone when accessing confined areas.
The main supply plenum, located directly above or beside your furnace or air handler, serves as the central distribution point for conditioned air. This area typically accumulates the heaviest debris concentration. To access it properly, you may need to remove screws securing a metal access panel. If your system lacks an access panel, creating one requires cutting into sheet metal, a task best left to a qualified mechanical contractor who can ensure proper resealing. Attempting to clean without adequate access points means you are only addressing surface contamination while leaving the bulk of debris untouched.
Using Correct Agitation and Extraction Techniques
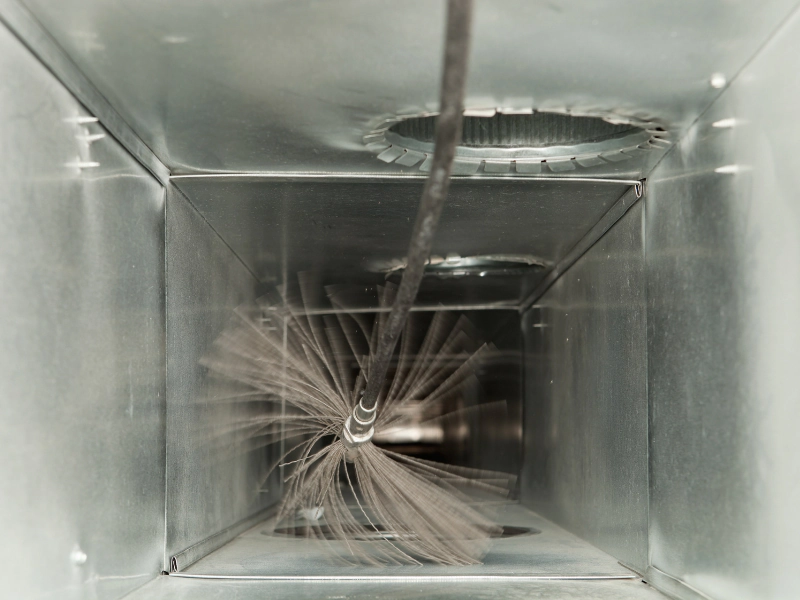
The cleaning process itself requires more than running a vacuum hose into a duct opening. Effective debris removal demands mechanical agitation to dislodge particles adhered to duct surfaces, followed immediately by negative-pressure extraction. Professional HVAC contractors use rotating brush systems and high-volume vacuum equipment that creates negative pressure throughout the entire duct system. Consumer-grade equipment cannot replicate this, but you can approximate the results with proper technique.
Start with the farthest supply registers from your air handler and work backward toward the unit. For each register, insert your brush as far as possible while rotating it against all interior surfaces. Work in sections, brushing vigorously for 30 seconds, then immediately following with your vacuum hose to capture dislodged material before it settles elsewhere. Standard household vacuums lack the suction power and filtration quality needed for this work. A HEPA-filter shop vacuum represents the minimum acceptable equipment; anything less will simply redistribute fine particles into your indoor air.
Return air ducts present a different challenge because they typically have larger cross-sections and lower air velocity during normal operation, allowing heavier debris accumulation. These ducts often contain construction debris that fell through register openings during home building or renovation. In Alabama’s humid climate, return ducts also accumulate more dust because they draw air from living spaces where humidity causes particles to clump and adhere to surfaces. Focus particular attention on return duct cleaning, and be prepared to remove surprising amounts of material from these areas. If you encounter wet debris or visible mold growth during this process, stop immediately and consult with an HVAC contractor who can assess whether remediation is necessary before continuing.
Addressing Air Handler and Blower Assembly Components
Even the most thorough duct cleaning provides limited benefit if you neglect the air handler and blower assembly, which serve as the heart of your ventilation system. The blower wheel, in particular, acts as a collection point for airborne particles. A contaminated blower reduces system efficiency, increases energy consumption, and reintroduces debris into freshly cleaned ductwork within days of completing your cleaning project.
Accessing the blower assembly requires removing the air handler cabinet door, which typically attaches with screws or latches. Once open, you will see the blower wheel, which resembles a squirrel cage with dozens of curved blades. This component requires careful cleaning because bent blades create vibration and noise during operation. Use a soft brush and vacuum to remove debris from between each blade, working methodically around the entire circumference. For heavily soiled blower wheels, some mechanical contractors recommend removal and washing, but this requires disconnecting electrical connections and potentially dealing with direct-drive motors or belt systems that demand specific knowledge for proper reassembly.
While the air handler is open, inspect the evaporator coil if your system includes AC installation. This component sits downstream from the blower in cooling mode and frequently accumulates dust that restricts airflow and reduces cooling capacity. The coil fins are delicate and easily damaged, so cleaning requires a gentle touch with a soft brush or specialized coil cleaning solution. Any aggressive scrubbing will bend fins and permanently reduce system performance. During humid summer months, condensation on the evaporator coil can cause dust to cake into a paste-like substance that resists simple brushing. If you encounter this condition, professional cleaning with appropriate chemical cleaners becomes necessary to restore proper function without damaging components.
Post-Cleaning System Testing and Performance Verification
After completing the physical cleaning work, most homeowners make the mistake of simply restarting their system without proper verification procedures. This final step determines whether your efforts achieved meaningful results or merely moved dust around within the ductwork. Before restoring power, replace your air filter with a new, high-quality unit. Using the old filter defeats the purpose of cleaning because it will immediately reintroduce captured particles back into the system.
Restore power at the breaker panel, then set your thermostat to initiate a heating or cooling cycle depending on the season. Stand at each register throughout your home and verify that airflow feels noticeably stronger than before cleaning. Use your hand to feel the air stream, noting whether the temperature and velocity match expectations. Weak airflow from specific registers may indicate duct separation or obstruction that cleaning did not resolve. Listen carefully for any new rattling, whistling, or vibration sounds that were not present before you began work. These noises often indicate that a register cover was not reinstalled properly or that debris was pushed into a location where it now interferes with airflow.
For quantitative verification, use an inexpensive digital thermometer to measure supply air temperature at registers. During cooling operation, supply air should measure 15 to 20 degrees cooler than return air temperature. During heating with a gas furnace, supply air typically measures 40 to 70 degrees warmer than return air, depending on outdoor temperature and system staging. Significant deviations from these ranges suggest that your system has underlying performance issues beyond simple duct contamination. In these situations, scheduling an AC maintenance visit or furnace repair evaluation provides more value than additional cleaning efforts. Professional HVAC contractors can perform combustion analysis, refrigerant charge verification, and airflow measurements that reveal problems invisible to DIY inspection.
Consider that comprehensive air duct cleaning involves specialized equipment and training that goes well beyond what most homeowners can accomplish independently. If your system is more than ten years old, has never been professionally cleaned, or if household members experience unexplained respiratory symptoms, professional service provides benefits that DIY methods cannot match. Qualified mechanical contractors use camera systems to inspect inaccessible duct sections, seal leaks that waste conditioned air, and verify that your entire HVAC system operates at design specifications after cleaning.